Friday, 13 December 2013
The Bicycle Thieves - BAC12 Trailer Project
So here is the finished film! We have a single name to add to the credits but otherwise it's done. Enjoy!
Thursday, 12 December 2013
Wednesday, 4 December 2013
The Bicycle Thieves Part 6: Look Development
So after many weeks of technical stuff in Maya we finally reached the stage called look development, which is where we tweak the lighting, textures and shaders to make the film look the way we want it to look.
We had always aimed for a flat look that was more based on strong lighting and texture work than impressive shading to get a warm feeling across, now it was time to apply that idea to our scenes and see if it worked. An important part of this step is achieving the look you want while keeping the render times as short as possible.
Until next time!
We had always aimed for a flat look that was more based on strong lighting and texture work than impressive shading to get a warm feeling across, now it was time to apply that idea to our scenes and see if it worked. An important part of this step is achieving the look you want while keeping the render times as short as possible.
 |
| We settled on using cards for clouds. They could be more stylized this way as well as being very cheap in terms of render times. |
During this period the animators got a hold of our rigs and got to animating our shots, they only had two weeks to turn around two shots each, so their workload was quite large!
The two shots above are representative of where we stand at the moment as we move into compositing. This is the final step where we'll put everything together and make any final tweaks before we call it done. The deadline is next week Friday, so we're going to be pushing hard this next week.
Until next time!
Tuesday, 3 December 2013
Interlude
Gonna take a break from talking about the film to post the latest scribble. This was inspired by my recent dungeon runs in Descent: Second Edition, a fantastic DnD-lite boardgame.
Monday, 2 December 2013
The Bicycle Thieves Part 5: Prop Modelling and Rigging
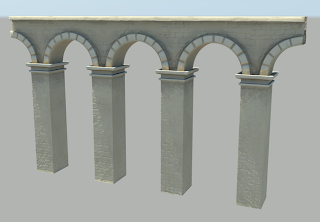
With the characters done we could focus on getting all the props together. We had a vast library (something around 30 or so) of props, many of which where building 'chunks', windows, doors, bridges and other paraphernalia to decorate our city with, so we had a lot to do!
Below are two examples of the props I worked on.
Below are two examples of the props I worked on.
I also threw together a compilation shot of all of our props, including the monstrous 'chunks' which we used as a basis for all our structures.
We also started rigging! There really isn't much to show here, but we did a lot of work, putting together four fully rigged characters in three weeks.
 |
| It involved a lot of this sort of thing. |
The end result? Poseable characters!
Tomorrow we get back to the fun part. Colours and lighting in look development!
Sunday, 1 December 2013
The Bicycle Thieves Part 4: Modelling Continued
Once the DLO was over and we had decided how to split up the assets between us, we dived into Zbrush to begin sculpting our characters. At the same time we began to model our props for the city in Maya.
Due to the challenge of building big environment pieces we decided to essentially build the city out of very large 'props', which we would then propagate with other props and assets, in a process not dissimilar to level building in videogames. This meant we could focus on our individual pieces and then throw them all together at the end and (hopefully) end up with something looking like a city.
As for the characters, we got one each. I was given Antonio, the father. Below is his finished Zbrush sculpt, which took me a few days.
He was then retopologized in Maya (retopology is the process of breaking down a high resolution sculpt like the one above into a more managable, lower detail mesh).
And eventually our characters all got a lineup in the sun.
Tomorrow I will briefly discuss rigging and prop modelling, before we move on to look development!
Subscribe to:
Comments (Atom)


